Transform Your Photos with Halloween Scenes Backgrounds
Every photographer and content creator knows the seasonal struggle: you want to capture the essence of Halloween, but the logistics of creating a spooky set are a nightmare. Between sourcing props, finding the right location, and the hours spent on setup and teardown, the creative process often takes a backseat to preparation. This is where the efficiency of modern digital assets becomes a game-changer. Instead of building a physical set, imagine having an entire library of high-quality scenes at your fingertips, ready to drop into your workflow. This is the core value of using professional digital backdrops. They are not just images; they are tools designed to save you significant time, reduce costs, and eliminate the need for physical storage space entirely.
More Than Just a Picture: The Anatomy of a Digital Backdrop
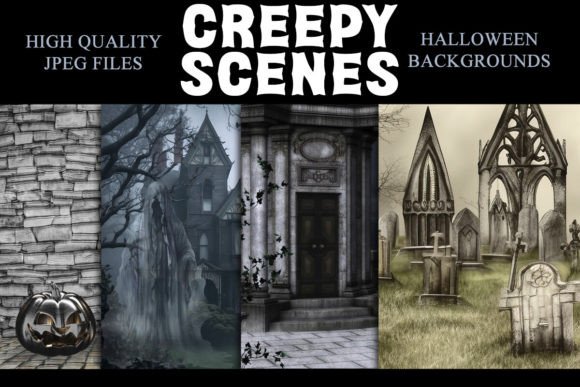
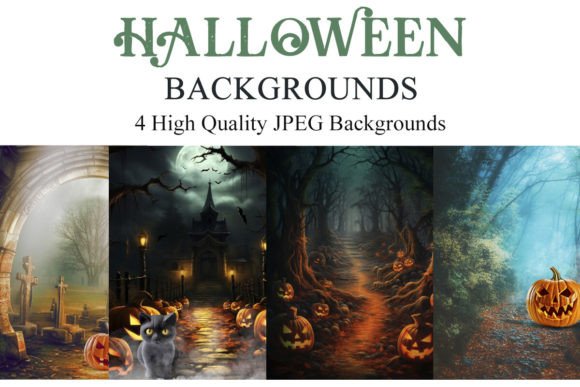
At its heart, a digital backdrop is a high-resolution image file, typically a JPEG, crafted to serve as a realistic or artistic background for a photograph. The Halloween Scenes Backgrounds collection exemplifies this concept perfectly. Each backdrop is designed with a specific mood and scene in mind, from the eerie glow of a pumpkin patch at twilight to the mysterious interior of a haunted Victorian library. The visual personality of these assets leans into authentic Halloween aesthetics—think moody lighting, rich textures, and a balanced composition that leaves intentional space for a subject. This isn't about flat, cartoonish designs; it's about creating a believable environment that can elevate a simple portrait into a compelling narrative. The style is versatile, working for both spooky realism and more whimsical, storybook-inspired projects.
The practical details matter. These particular backdrops come in a standard 8" x 10" aspect ratio at 3000 x 2400 pixels and a crisp 300 dpi. This specification is crucial. It means the image is large enough for high-quality printing—ideal for creating physical products like holiday cards, posters, or framed art—and dense enough to ensure sharp detail on screen. As a JPEG file, it's universally compatible, but its real power is unlocked when used in a layered editing environment. Think of it as a digital canvas. You place your subject—be it a person, a pet, or a product—onto a separate layer above the backdrop, then use masking, blending, and lighting adjustments to seamlessly integrate the two. This process is the foundation of composite photography and photo manipulation, allowing for endless creative control.
Practical Applications Across Creative Disciplines
The utility of a versatile digital asset like this extends far beyond a single use case. For the professional photographer, it's an efficiency tool. A family portrait session can now offer Halloween-themed options without leaving the studio. A product photographer can instantly place a client's item—a candle, a piece of jewelry, a gourmet candy box—into a festive setting for seasonal marketing campaigns. The value proposition is clear: offer more variety to clients with less physical overhead.
For marketers, bloggers, and content creators, these backdrops are a goldmine for consistent branding. Imagine a food blogger needing a consistent, spooky background for all their October recipe photos, or a social media manager creating a cohesive series of Halloween-themed posts for a brand. Using the same digital backdrop across multiple images ensures visual consistency, a key component of a strong brand identity. It saves hours of searching for stock photos that all look "close enough" and instead provides a perfect, repeatable setting. Small business owners can use them for packaging design mockups, website banners, or email marketing graphics, adding a professional, seasonal touch without hiring a designer for every asset.
Even for personal use, the applications are compelling. Crafters can design unique Halloween party invitations or thank-you cards. Hobbyists can create fun, composite images of their kids or pets in spooky scenes. The learning curve is gentle; these assets work in everything from advanced software like Adobe Photoshop and Lightroom (with an appropriate plugin) to more accessible tools like Paint Shop Pro, GIMP, and even some mobile apps that support layers. This broad compatibility makes professional-level photo manipulation accessible to a wider audience.
Achieving Seamless Integration: From Concept to Final Image
Simply slapping a subject onto a new background rarely looks convincing. The key to a professional result lies in thoughtful integration, and planning your composition beforehand is non-negotiable. Before you even take the photo of your subject, study the digital backdrop. Note the direction and quality of the light. Is the light source coming from the upper left, casting soft shadows to the right? Are there multiple light points, like from jack-o'-lanterns? Your subject must be lit to match. This might mean positioning a studio light or reflector during the shoot to mimic the scene's lighting direction. This single step—matching the lighting—is what separates an amateurish cut-and-paste job from a believable composite.
Next, consider scale and perspective. The backdrop's elements provide visual cues for where your subject should be placed and how large they should appear. A subject placed too large or too small will break the illusion. Use the backdrop's foreground and background elements to guide your placement. Finally, pay attention to color grading and atmosphere. After compositing, apply a unifying color grade or filter to both the subject and the backdrop layers. This blends the tones and ensures they look like they were captured in the same environment. Adding a subtle layer of atmospheric haze or a vignette can further sell the realism.
When choosing a backdrop, evaluate it like any other design asset. Does its style align with your project's tone? A dark, gothic scene works for a mysterious brand, while a playful, cartoonish yard might be better for a children's event. Test how your subject's colors interact with the backdrop's palette. High contrast can create drama, while a harmonious palette can feel more cohesive. Remember, the goal is to use these tools to enhance your vision, not to let the asset dictate it entirely. By treating digital backdrops as a foundational element in your creative toolkit, you unlock a level of efficiency and professionalism that directly translates into better work and a more streamlined process.